Been thinking that having labels on my sewing items will add extra 'exclusivity' to them. Some sort like an in-house brand. Thus, I have been scouting high and low for them. Labels are not difficult to find. However, the price those suppliers quoted were ridiculously high. Thus, I have been shelfing this thought for a long time.
The desire to have the labels surfaced again when I came across blogs talking about iron-on transfer paper. Thus I experimented making my own labels. The materials needed are :
Iron-on transfer paper
Ribbon
Iron
Deskjet printer
First, I created a document containing the design of my desired label, together with the brandname that I have chosen - Annie's Creations.
A deskjet printer is needed to print on the iron-on transfer paper. Laser printer will not work. For printing on the iron-on transfer paper, the image need to be printed as a mirror image. This feature can be selected from the print properties.
 |
| Printed as mirror image on iron-on transfer paper |
Upon printed, strips of the labels were cut and placed on the ribbon. I used satin ribbon for this as I like the glossy look.
 |
| Placing the iron on transfer paper on the ribbon |
The iron needs to be very hot. Ironing of the transfer paper took only about 20 - 30 seconds. The back of the transfer paper was then tore off. The ribbon was then cut according to each of the label block.
 |
| Peeling the back of the transfer paper upon ironing |
 |
| Labels are done |
 |
| Labels were cut individually |
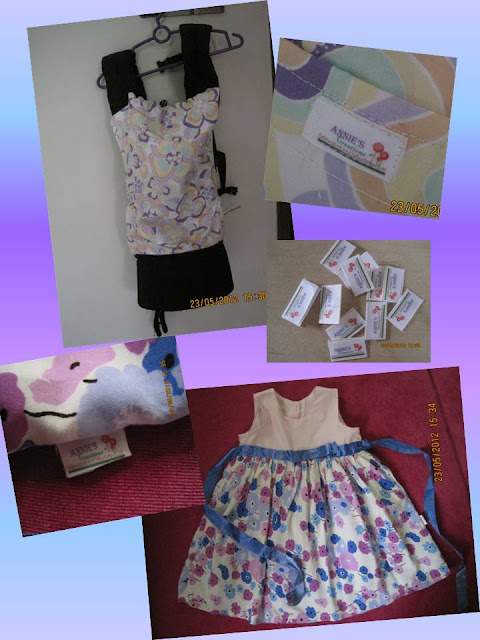
I was all excited after I was done making the labels. Sewn them on my DIY soft structured carrier (SSC) and one of the dress I sewn for my girls for chinese new year. With the labels, they look like store bought. I am indeed thrilled with the result.
 |
| Labels sewn on SSC and dress |
No comments:
Post a Comment