Monday, November 12, 2012

Tutorial - Doraemon Pillow cum Blanket

A simple step by step guide on how to sew the Doraemon pillow cum blanket.


Materials :

1.5m  blue fleece
Small pice of white fleece (or any stretchy fabric)
Small piece of pink fleece
Small piece of orange fleece
Tiny piece of black fleece
0.5cm width black ribbon
A little polyfiber
2 24 inches jacket zipper


Method :

1) Cut 2 pieces of blue fleece in the shape of flat bottom ova l (width = 18 inches, length = 15 1/2 inches), a piece of white fleece resembling the face, a piece of pink fleece in the shape of semi oval and a piece of orange piece resembling the tongue.
  (Note :  It would be easier to draw the pattern on a piece of paper and transfer it to the fleece for cutting).


2) With the right side of the fabric facing up, place the white fleece on top of the blue to make out the face.  Trim if needed.  Pin in place.

3) Sew the white and blue together using the stitch no. 10 in the Brother NV50 sewing machine with white thread  (Note :  Attach the correct foot for the stitch).


4) Pin the orange fleece to pink to make out the tongue.  Pin in place and sew using the same stitch (No. 10) with pink thread.


5) Arrange and pin the mouth to the face.  Trim if needed and sew using with pink thread using stitch no. 10.


6) Place and pin the whites for eyes in place. Sew with stitch no. 10 using black thread. 

7) Place a tiny piece of oval shaped black fleece on the right side of the right eye and pin in place.  Cut a 6cm long black ribbon, fold to make an inverted V and pin on the left eye.  Sew in place using straight stitch.


8) Pin the bridge of the nose and whiskers in place using black ribbon Once satisfied with the shape and length, sew using straight stitch.


9) Put a little polyfiber on a small piece (~9cm  x 9cm) of pink fleece.  Bunch together and sew to close the opening.  This will make the nose.  Place between the eyes and handstitch in place.


10)  Spread out a 1m x 1.3m blue fleede.  Place the face of the doraemon at the upper middle and the other piece of the head at the bottom middle with the chin meeting each other. 
(Note :  the right side of the fabrics should be facing up)

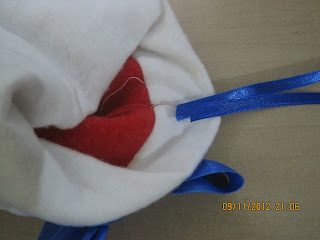
11) Open up a jacket zipper.  Starting from the crown of the doraemon, pin the side of the zipper with the pulley to left side (facing you) of the doraemon, working all the way down to the chin.  The other side of the zipper (without the pulley) should be pin to the other piece of the blue fleece (without the face).  Repeat with the other side.

12) Attach the zipper foot to the sewing machine and sew the zippers in place.


The doraemon pillow cum blanket is now done!!


Happy sewing!!


Sunday, November 11, 2012

Learning to Count

Parents always beam with pride when their children learnt something new, especially when they did it way before they are expected to do so.  I am no tiger mum and I am not in a hurry to see my kids don the mortar board.  But then, I still want them to learn the necessary skills as young as they could.

A group of mummies were talking about Montessori activities and referred to a certain blog where the writer blogged about those activities she prepared and taught her kids to do.  There was one particular that caught my attention, learning to count by putting the correct amount of marbles beside the number.  I was keen to try it out as my girls have already known one to ten, but I doubt if they really know what the numbers mean. 

AsI have a little boy who just knew how to crawl and put everything within his reach to his mouth, using marbles doesn't seem to be a good idea.  Imagine if we missed out some marbles and my boy swallowed it?  So, I modified the counting chart to a big one using manila card.  The chart is an easy one to make.  Just label it as 'Numbers' and draw the correct number of squares beside the number.  The kids are supposed to place the correct number of marbles onto the squares.  I don't really like the idea of confining learning within the four walls, thus, I got the idea of making them count using stones at the outdoor.  We have unlimited supply of stones in our garden.

Once the charts were done, off we went to the garden.  The squares couldnt accommodate large stones, thus, I made my girls sorted the smaller ones.  This way, they also learn the concept of sizes in the process.  The girls had so much fun doing it and even asked me to keep the chart properly so that they can 'play' again next time.  But then of course, they do run here and there, admiring the fish and all, before completing the whole chart.  Kids will always be kids.  :)


Friday, November 9, 2012

DIY Socks for Christmas

Children were told that Santa Claus will drop presents for them if they hang their socks at the chimney.   That is why socks is a must in yuletide decor.  I read before that actually Santa (if he exists) accidentally dropped a present into the socks when he attempted to climb down the chimney, not so much as he intended to put it there in the first place.  It doesn't matter anyway as what the children want are the presents.

Here is my attempt in sewing a simple (very simple in fact) socks for christmas this year.


Materials :

Red fleece
White fleece
Printed cotton
Ribbon


Method :


1)  Cut out 2 pieces of the red fleece in the shape of the socks, 2 pieces of rectangular white fleece with the same width as the red piece and 2 pieces of decorative printed cotton (for the soles and decor). 
Note : It helps to use a pair of long socks as guide when cutting. Remember to add in the seam allowance.


2)  Place a piece of the printed cotton onto the red fleece with both sides facing up.  Sew in place with zig zag stitch.  Repeat for the other piece of red fleece and printed cotton.


3)  Place the heart shaped printed cotton on the upper middle of the red fleece with the right sides facing up.  Sew in place with zig zag stitch.  Repeat for the other piece of red fleece.


4) Align a piece of the white fleece on the top of the wrong side of the red.  Sew the edge with straight stitch.  Repeat for the other piece.


5) Align both red pieces together with the right side facing each other.  Sew along the edge leaving out the white.


6)  Turn the socks inside out so that the right side is now facing out.


7)  Sew both the vertical edges of the white fleece.

8) Fold down the now sewn white fleece twice.

9) Make a bow using ribbon and stitch onto the white fleece.

10)  Make a loop using ribbon and sew to the inside edge of the socks


The socks is now done!!!


The vertical edges of the white fleece were sewn with the right side facing out so that the stitches will not be seen once the fleece is folded down.  Variations can be made to the socks once the technique of sewing is known.  For example, use buttons instead of bow for decor, adding in heels, etc.  The possibility is endless.

Now is there any present to be put into the socks?

Wednesday, November 7, 2012

DIY Christmas Tree Ornaments

Ho Ho Ho!!  Christmas will be coming soon and it is time to put up our tree. 

Having a christmas tree had been my childhood dream and it finally got fulfilled last year.  Our collection of  tree's ornaments is still very small.  All we have are some orbs in different sizes of purple, gold and silver.  Others consist of bows and boxes that I made myself. 

Making the ornaments on our own really saves a lot of money as the commercial ones do not come cheap at all.  This year, I have made a few to add to our collections.


1)   The christmas trees were made by twisting a fine golden wire and ended with a loop.  Gold thread was threaded through the loop.  The beaded version was made by threading the wire with pearl beadlets.


Plain and beaded christmas tree


2)  The angel's head consists of a ping pong ball with some polyfiber glued as hair.  The head was then glued to the body which is made of cardboard.  A bow, served as wings is attached to the back.  There is an angelic circlet made of silver wire on the head though it is not visible in the picture.  Eyes and mouth were drawn with marker pen.


Angel made of cardboard and ping pong ball


3)  Silver beads were used to make the circlets.  Bows of purple or green color were tied at the upper side of the circlet.
Silver beads circlet with purple bow


Silver beads circlet with green bow

4)  Snowflake made of silver beads


5)  Winged silver beads with bow


6)  Fairy repurposed from pine cone and orb. 


All the ornaments are pretty on their own.  However, when they are put in combination with the LED lights, the effect is superb!  This is really a cheap and nice way of decorating the christmas tree.