Following many requests from MB members, I have finally decided to post a step by step guide of dolls making. Been delaying this as I just did not have time and heart to lay my hands on dolls making again and it was only yesterday, out of desperation to get a unique gift for the daughter of a friend, I have finally picked up my needle and thread again. This time I will be making a mermaid.
So, the materials needed are :
felt (in beige and pink), string of beads, yarn, glue, marker pen, polyfiber, needle and thread of course!
Step 1:

Cut the felt into the shapes of the head, arms and body. It will be helpful to first cut the shape out of a piece of cardboard and trace it to the felt. DO NOT pull or stretch the felt when cutting or sewing.
The pink felt is to be cut in many pieces of circular shape.
Step 2 :

Stitch the body at the edges and fill it with polyfiber when almost done. Stitch to close the whole body.
Repeat the same for the head and arms.
Step 3 :

Arrange and stitch the scales to the body of the mermaid, starting from the tail. I used to glue the scales to the body but it gave it a very 'stiff' look, not to mention that the glue makes the mermaid smells funny.
Build up the scale to a considerable height of the body. Repeat the same to the other side.
Step 4 :

This is the part I dreaded most. Simply because I am not good at hair cutting.
In order to make the hair, wind the yarn over a book 80 times. Cut the yarn at both ends. I would recommend using a hardcover book as it makes the cutting lots easier and it won't damage your book.
Thereafter, put a yarn at the middle of the 'hair' and make a tight knot. Stitch the hair to the head at the crown. Make sure the stitches are strong. You do not want the hair falling from the doll.

Smoothen the hair and glue them in place with white glue. You can glue the whole of the back but be sure to only spread the glue at the forehead as we will need to trim the front so that the mermaid will have fringe.
Stitch the head to the body when done. In this process, the hair will get messed up (a lot!) but don't fret. You can always smoothen the hair back and glue it again when you are done. One can actually glue and trim the hair when everything is done but I prefer to trim it first as it will give you a clearer picture on how the mermaid will look like and where you should stitch to balance things out (in case the hair is lopsided).

Step 5 :
Stitch the arms to the side of the body.
Draw the eyes on a piece of paper using black marker pen and cut them out. Glue the eyes to the face of the mermaid.
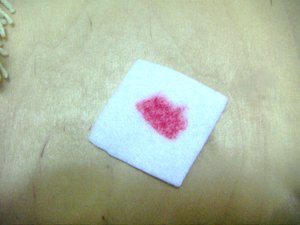
Smear some red marker onto a small piece of felt and gently rub it to the cheeks of the mermaid to give her a nice rosy glow. One can always use blusher but I am not so sure of the pigment staying power.
Place the string of beads to the head of the mermaid. If the hair of the mermaid still look messy, fear not! The string of beads will help smoothen the hair in a day or two. Remember to trim the hair again after it has smoothen out or the mermaid will look like she is having a bad hair day.

Voila! A mermaid is born!!
No comments:
Post a Comment