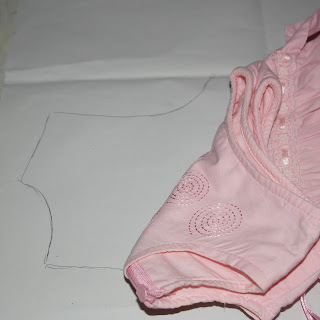
For someone like myself, who has never attended any dress
making class before, drawing the right pattern is a bit tricky. I usually do it
by using any existing clothes that fit and trace the pattern from there. It works, although I cannot say that this is
the right way of doing. But what matters
is that it works, right? So, in this
entry here, I am going to show how to draw a pattern to sew a little girl’s
dress.
First, get a dress that fit your child. Fold it lengthwise into two, with the front
facing out. Put it on a piece of paper
and trace the outline of the top, right till the torso, where the skirt
starts, Remove the dress and you will
need to draw a line to join the torso.
Straighten any crook lines with a ruler. We need to draw the seam
allowance next. I prefer my seam
allowance to be 1cm. Thus, I drew
another line, measuring 1cm out from my earlier tracing. This, I label as the back piece. Note that I also labelled the seam allowance
as 1cm so as not to confuse myself later.
I also labelled the folding part as ‘fold’. When we transfer the pattern to the fabric, the
‘fold’ of the pattern should coincide with the folding of the fabric.
It should be noted that the above is for the back piece of a
dress where the zipper is at the side. If you prefer to sew the zipper at the
middle, then you will need to cut 2 piece of the fabric, as the mirror
image. I find it easier to fold and cut
the fabric as described, and then cut along the ‘fold’ to get 2 identical
mirror pieces.
Next, we need to trace the pattern of the front piece. The back and front piece differs at the
neckline. The neckline for the front
piece is usually lower than the back.
The steps for tracing the back piece is repeated. However, we couldn’t draw across the front
neckline. Thus, I put a mark at where
the neckline is, removed the dress, and draw the curve freehand. Again, the drawing of the 1cm seam allowance
is repeated. This piece is then
labelled as the front.
Now we move on to drawing the pattern of the skirt. Measure the skirt starting from the torso to
to the end. I labelled it as A cm, as
shown in the pic. Then, measure the
front piece of the skirt, from left to right (all fabric spread out) and label
it as B cm. Next we draw a rectangle on
a piece of paper, with the length as A +2 cm and the width as B/2 + 1cm.
For example, if you find A as 30cm, then you should draw the
length of the rectangle as 32cm (30 +2).
If B measures as 50 cm, then the width of the rectangle should be 26 cm
(50/2 + 1). Label the side as ‘fold’ to
remind yourself to coincide it with the fold of the fabric when cutting. The reason to add 2 cm seam allowance to the
length (A) is that 1cm is for the top where the skirt will join with the top
and another 1cm for the hem of the skirt.
If you feel that your child will outgrow the skirt very soon (children
grow very fast), by all means, allow a few extra centimetres for the hem so
that you can lengthen it when the time comes. It should be reminded that you will need to cut 2 pieces of this skirt pattern for the front and back.
So now, the pattern of the dress is ready.
Happy sewing!


