A tried and tested grapefruit marmalade recipe that a friend gave me and which I have tweaked a bit.
Ingredients :
3 grapefruits (~800g)
850g sugar
juices from 2 lemons
Method :
1) Put the grapefruits in a pot, add in enough water so that the grapefruits are able to float freely. Bring to a boil till for 2 hours.
Note : Water need to be replenished every now and then.
2) Remove the grapefruits from the pot and let cool.
3) Chop the grapefruits thinly, remove the pith and put the chopped grapefruits back into a clean pot.
4) Add in the lemon juice and sugar.
5) Let the sugar dissolve and stir constantly.
6) Bring the mixture to a boil till it reaches the setting point of 110 deg C.
Note : If you do not have any thermometer, drop a little of the mixture onto a plate that has been put in the freezer beforehand. Let chill for 1 - 2 mins. Push the mixture with your finger. If the surface wrinkles, it means the setting point has been reached. Otherwise keep heating and repeat the testing procedure.
7) Ladle into mason jars, cover and leave to cool completely.
The jam sets perfectly. It is not too sweet and leave a little bitter after taste, which is not unpleasant.
Monday, February 1, 2016

Sunday, December 27, 2015
Christmas Treasure Hunt
Kids like Christmas because of the gifts that never failed to appear at the foot of the Christmas tree. This year, we did something different. Rather than putting the presents under the tree, the kids have to hunt for them through a series of clues. A Christmas Treasure Hunt. It sounds exciting!
The kids 'reported' early for the hunt. Since this is the first time we have such treasure hunt, I made the clues simpler and more straight forward. Nevertheless, it made the kids ran up and down to search for the next clues. The kids were excited to finally found their treasures. Perhaps next year, I'll do a la 'Amazing Race', or make the kids do a bit of chores before we surrender the next clue to them.
 |
| Clue Card |
 |
| Clue Card |
 |
| Clue Card Peeking from Its Hiding Place |
 |
| Clue Card Nestled Among the Tree |
 |
| Found the Clue Card! |
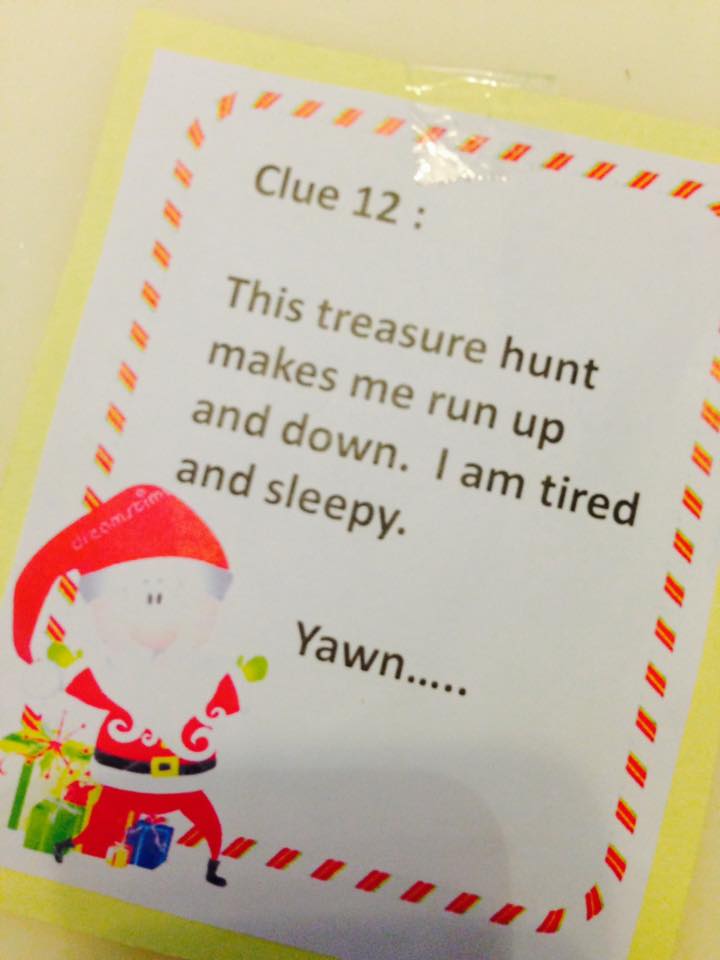 |
| The Final Clue |
Friday, July 3, 2015
Play Cafe
Learning about money from books is boring and only invites yawn and daydream, and also frustrations to both parent and kids. So we are going on the learning through playing approach.
Printed some 'money' for the kids to put in their toy cashier and also made a menu for the 'customer' to select their food from. It was fun taking pictures of the toy food and making the menu. I had no idea we have so much varieties of food available.

These are some of our menu :
Breakfast set. A set of this cost you RM12.

 |
| Tea and Coffee |
Whole cake costs RM35. A slice is RM12.
 |
The menu


The kids and I took turn to be the cashier, waitress and customers. It was fun and they were very serious in their work. The maths and concept about money become much easier to grasp. Most importantly, we are spending quality time together.
 |
| Getting serious at work |
 |
| Waiting on customers |

 |
| Our table |
DIY Dinosaur Play Fossil
Inspired by the 'Backyard Science' show recently, the kids requested to try making fossils.
So here are the fossils, made from my little boy's play dinosaurs.
Materials :
Plaster of paris
Sand
Water
Petroleum jelly / oil
Large container
Play dinosaurs
Steps :
1) Fill the container with sand, compacting them as much as you could.
2) Apply the dinosaurs generously with petroleum jelly or oil.

3) Press the dinosaurs horizontally on the sand.
4) Prepare the plaster of paris according to the instructions on the packet. Wait for it to thicken to cream like.
5) Pour the plaster of paris carefully over the dinosaur, making sure to cover it completely.
6) Leave the plaster to set, ideally overnight.
7) Turn the container upside down to remove all its content.
8) Carefully remove the sand and the dinosaur.

9) Clean the fossil carefully to remove excess sand. Allow to dry.
Applying the dinosaurs with petroleum jelly or oil prevents it sticking to the plaster. Do be generous or else you will have a lot to answer for when your child does not get back his favourite toy. I did batch 1 with oil and batch 2 with petroleum jelly. Oil does work but the one applied with petroleum jelly is much easier to remove.
Removing and cleaning the fossils needed a lot of patience. As careful as we were, we still ended up breaking the fossils. But the kids were happy and thrilled nevertheless. At least we had a taste of what it is like to be an archaeologist.


So here are the fossils, made from my little boy's play dinosaurs.
Materials :
Plaster of paris
Sand
Water
Petroleum jelly / oil
Large container
Play dinosaurs
Steps :
1) Fill the container with sand, compacting them as much as you could.
2) Apply the dinosaurs generously with petroleum jelly or oil.

3) Press the dinosaurs horizontally on the sand.
4) Prepare the plaster of paris according to the instructions on the packet. Wait for it to thicken to cream like.
5) Pour the plaster of paris carefully over the dinosaur, making sure to cover it completely.
6) Leave the plaster to set, ideally overnight.
7) Turn the container upside down to remove all its content.
8) Carefully remove the sand and the dinosaur.

9) Clean the fossil carefully to remove excess sand. Allow to dry.
Applying the dinosaurs with petroleum jelly or oil prevents it sticking to the plaster. Do be generous or else you will have a lot to answer for when your child does not get back his favourite toy. I did batch 1 with oil and batch 2 with petroleum jelly. Oil does work but the one applied with petroleum jelly is much easier to remove.
Removing and cleaning the fossils needed a lot of patience. As careful as we were, we still ended up breaking the fossils. But the kids were happy and thrilled nevertheless. At least we had a taste of what it is like to be an archaeologist.


 |
| Look at the Texture |


 |
| Happy face with the fossil |
 |
| The fossil is heavy |
Thursday, April 9, 2015
2015 Cinderella Dress
My girls have been looking forward for the new Cinderella movie with much anticipation. Not really sure if they are looking forward for the Cinderella show itself or the Frozen Fever short film that is aired before the start of the movie. We enjoyed the Frozen Fever short film very much. Olaf is highly entertaining as usual while the sisterhood between Elsa and Anna is just as great.


The Cinderella movie itself is good but I don't think it is as good as Frozen. It will take a lot to topple Frozen from the fans' hearts. Perhaps cos we grew up very familiar with the Cinderella story and there is no element of surprise. The storyline is well known and we knew what is going to happen next. Anyway, the animation in the movie is good. I particularly like the castle and Cinderella's house. Really like a page from the fairytale.
Shortly after watching the movie, I knew what my girls will ask for next, the dress! So here it is.
I tried to stay true to the dress in the movie as much as I could but of course a little modification is needed here and there to suit children's bodies more.
The girls were thrilled with the dress and urged me to finish the 2nd one as soon as possible cos they just wouldn't share. But lucky me that since they are twins, the size will be the same and the 2nd dress will be just a duplicate. The patterns are all already in place 😀
Wednesday, February 11, 2015
A Manchu Chinese New Year
Dressing in traditional Chinese costumes during Chinese New Year (CNY) has made a come back in recent years. Usually parents dressed their little girls in cheongsam or modernised cheongsam. I myself have sewn a few for my girls in previous. This year, I decided to make something out of the norm, the Manchu court costumes.
The Manchus is the tribe who ruled China from 1644 to 1912. The era of their ruling is called the Qing dynasty, the last dynasty in China. The Qing dynasty was succeeded by the Republic of China
The Manchu court costumes consist of a long robe, which is not as figure hugging as cheongsam. During cold months, a sleeveless jacket is worn in addition to the long robe. An elaborate head dress complete the look. In the Manchu prime era, the head dress is an indication of the rank of the wearer. Servants wear it very simple and bare. Higher rank servants may decorate it with some flowers or cheap jewelry. Women with rank wore very elaborate head dress, decorated heavily with jade and jewelries. The style of the head dress however, differ from each reign of the Qing emperors.
 |
| Empress Cixi of Qing Dynasty |
The Manchus, unlike the Han Chinese, did not bind the feet of their women. The Manchu women wore elevated shoes instead. Together with the heavy head dress, the Manchu women stood tall and poised.
 |
| Elevated shoes of the Manchu Women |
I made some modifications to the costume, to cater for the tropical weather that we have here. The girls look absolutely adorable in their costumes. The head dress made them look very tall indeed, which was just what the Manchus set to accomplished with the head dress and elevated shoes.


Sunday, January 11, 2015
Strawberry Jam with Thermomix
I like homemade strawberry jam as I find commercial ones to be too sweet. However, what I don't like is to hover over the stove to cook the jam while stirring it constantly. With Thermomix, it is all a breeze.
Ingredients :
400g strawberry (de stemmed)
120g sugar
juice from 1 lemon
Method :
1) Put all ingredients in Thermomix bowl and cook at 100 deg C for 12 minutes, speed 2.
2) Blend the mixture at speed 4 for 10 seconds.
3) Cook at Varoma at speed 2 for another 10 minutes or till it achieved your desired thickness.
4) Pour the jam into sterilised mason jars and closed tight.
Usual jam making requires the use of a thermometer to see whether the gelling temperature (~105 deg C) has been reached. In the absence of thermometer, the gelling phase can be tested by putting a little of the jam mixture onto a metal spoon that has been placed in the freezer for at least 15 minutes. If the mixture sets on the spoon, this indicates that the gelling temperature is achieved. However, with Thermomix, these steps can be omitted as the Varoma setting cooks at 120 deg C, way beyond the gelling temperature.
Ingredients :
400g strawberry (de stemmed)
120g sugar
juice from 1 lemon
Method :
1) Put all ingredients in Thermomix bowl and cook at 100 deg C for 12 minutes, speed 2.
2) Blend the mixture at speed 4 for 10 seconds.
3) Cook at Varoma at speed 2 for another 10 minutes or till it achieved your desired thickness.
4) Pour the jam into sterilised mason jars and closed tight.
Usual jam making requires the use of a thermometer to see whether the gelling temperature (~105 deg C) has been reached. In the absence of thermometer, the gelling phase can be tested by putting a little of the jam mixture onto a metal spoon that has been placed in the freezer for at least 15 minutes. If the mixture sets on the spoon, this indicates that the gelling temperature is achieved. However, with Thermomix, these steps can be omitted as the Varoma setting cooks at 120 deg C, way beyond the gelling temperature.
 |
| Scones served with strawberry jam |
Subscribe to:
Posts (Atom)